

Webアプリケーション開発において、さまざまなフレームワークやライブラリの登場により、表現や操作性も飛躍的に向上し、ブラウザ上で画像を描画する機能開発も多くなりました。
Webアプリケーションで画像を描画する場合はcanvasタグやSVGタグを用いますが、今回はSVGタグを用いた画像描画機能をご紹介いたします。
SVGタグは、XMLベースのベクター画像フォーマットであり、Web上で2次元グラフィックスを描画するために使用します。SVGは解像度に依存しないため、どのようなサイズでも高品質な表示が可能です。 また、XMLベースなのでテキストで編集可能です。
詳細な仕様はW3Cのサイトをご参照いただければと思いますが、主な要素は以下のとおりです。
| 要素名 | 説明 | 主な属性 | 例 |
|---|---|---|---|
| rect | 長方形を描画します。 | x, y: 長方形の左上角の座標 width, height: 長方形の幅と高さ fill: 塗りつぶしの色 |
<rect x="10" y="10" width="80" height="80" fill="yellow" />  |
| circle | 円を描画します。 | cx, cy: 円の中心の座標 r: 半径 fill: 塗りつぶしの色 |
<circle cx="50" cy="50" r="30" fill="red" />  |
| line | 線を描画します。 | x1, y1: 線の始点の座標 x2, y2: 線の終点の座標 stroke: 線の色 |
<line x1="10" y1="10" x2="90" y2="90" stroke="green" />  |
| polygon | 多角形を描画します。 | points: 各頂点の座標のリスト fill: 塗りつぶしの色 |
<polygon points="50,15 90,85 10,85" fill="purple" />  |
| text | テキストを描画します。 | x, y: テキストの開始位置 font-family: フォントファミリー font-size: フォントサイズ fill: テキストの色 |
<text x="20" y="55" font-size="20" fill="blue">Sky</text>  |
| 複雑な形状や曲線を描画します。 | d: コマンド(M、L、Z等)と座標点のリスト fill: 塗りつぶしの色 stroke: 線の色 |
<path d="M10 10 L90 90 L90 10 L10 90 L10 10Z" fill="none" stroke="brown" /> 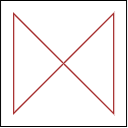 |
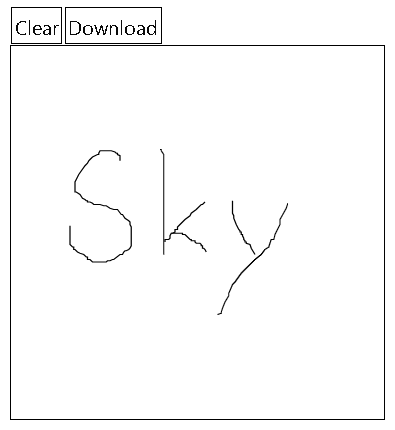
Next.jsのクライアントコンポーネントとして作成した描画機能の実装例は以下となります。
実装例はpath要素を用いたフリーハンド機能のみの実装ですが、上述の要素を利用すれば円や四角の描画機能は簡単に実現でき、上記以外にもグループ化などの要素もあるため、高機能な画像描画機能も実現可能です。
Web上で描画機能を実装する際の参考になれば幸いです。
【ソースコード】
use client';

import { useRef, useState } from "react";

export function Paint() {
  const svg = useRef<SVGSVGElement>(null);
  const [drawing, setDrawing] = useState<boolean>(false);
  const [pathElement, setPathElement] = useState<SVGPathElement | null>();

  const getCoordinate = (e: MouseEvent): { x: number, y: number } => {
    if (!svg.current) return {x: 0, y: 0 };
    const ctm = svg.current.getScreenCTM() as DOMMatrix;
    return new DOMPoint(e.clientX, e.clientY).matrixTransform(ctm.inverse());
  }

  const handleMouseDown: React.MouseEventHandler<Element> = (e) => {
    if (!svg.current) return;
    setDrawing(true);
    const point = getCoordinate(e.nativeEvent);
    const pathElement = document.createElementNS('http://www.w3.org/2000/svg', 'path') as SVGPathElement;
    pathElement.setAttribute('id', Math.random().toString(32));
    pathElement.setAttribute('d', `M${point.x} ${point.y}`);
    pathElement.setAttribute('stroke', `black`);
    pathElement.setAttribute('fill', `none`);
    svg.current.appendChild(pathElement);
    setPathElement(pathElement);
  }

  const handleMouseMove: React.MouseEventHandler<Element> = (e) => {
    if (!drawing || !pathElement) return;
    const point = getCoordinate(e.nativeEvent);
    pathElement.setAttribute('d', pathElement.getAttribute('d') + `L${point.x} ${point.y}`);
  }

  const handleMouseUpOrLeave: React.MouseEventHandler<Element> = (e) => {
    setDrawing(false);
  }

  const handleClear: React.MouseEventHandler<Element> = (e) => {
    if (!svg.current) return;
    svg.current.innerHTML = '';
  }

  const handleDownload: React.MouseEventHandler<Element> = (e) => {
    if (!svg.current) return;
    const svgData = new XMLSerializer().serializeToString(svg.current);
    const a = document.createElement('a');
    a.download = 'sample.svg';
    a.href = URL.createObjectURL(new Blob([svgData], { type: 'image/svg+xml' }));
    a.click();
    a.remove();
  }

  return (
    <>
      <button type="button" style={{ border: '1px solid #000', padding: '2px', margin: '1px'}} onClick={handleClear}>Clear</button>
      <button type="button" style={{ border: '1px solid #000', padding: '2px', margin: '1px'}} onClick={handleDownload}>Download</button>
      <svg
        xmlns="http://www.w3.org/2000/svg"
        ref={svg}
        width={300}
        height={300}
        viewBox="0 0 300 300"
        style={{ border: '1px solid #000', userSelect: 'none'}}
        onMouseDown={handleMouseDown}
        onMouseMove={handleMouseMove}
        onMouseUp={handleMouseUpOrLeave}
        onMouseLeave={handleMouseUpOrLeave} />
    </>
  );
}
【コンポーネント実行結果の画面ハードコピー】
以上、よろしくお願いいたします。
